With a broken blender, it was easy to forget that my mixer had a blender attachment that I could use.
I popped on the blender attachment, and was on my way. Below I’ve highlighted attachments for our #1 mixer of choice:
Cuisinart Stand Mixer — Much More Than a Mixer
Did you know the Cuisinart Stand Mixer (see our review) has 3 power ports where you can attach 5 different appliances? The attachments that fit the Cuisinart SM-55 model include:
- Blender
- Food Processor
- Citrus Juicer
- Meat Grinder
- Pasta Maker
I like the idea of combining power bases and saving storage space in the kitchen!
The top cover of the mixer hinges open revealing three power outlets where you plug in the different attachments:
- The High-speed outlet is on the rear, top of the mixer and is for connecting the Blender or Food Processor attachment (sold separately).
- The Mid-speed outlet is located on the front, top of the mixer and is for the Citrus Juicer attachment (sold separately).
- Finally, the Slow-speed power outlet is on the front of the mixer head and is used for the Pasta-Maker and Meat Grinder attachments (sold separately).
Here’s what they can do:
Make it Blend
With the Blender attachment you can make a variety of smoothies, milkshakes, dips, pesto sauces, and batters.
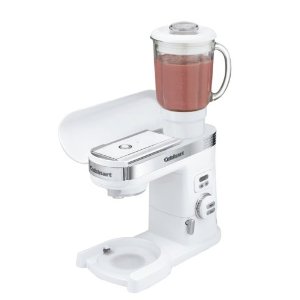
Set Up:
Cuisinart’s proprietary blender mounts on the high-speed power port located on the top, rear of your mixer.
Simply open up the top cover, mount, and twist.
Since you’re using the stand mixer as a power source, you have 12 speeds for all blending functions, including crushed ice.
Here are some key features:
- 40 oz glass jar
- Leak-resistant cover
- 2-ounce removable lid for adding ingredients
- 12 blending speeds
- Recipe Booklet included
- Measures 7 x 5 x 10.5 inches
Can You Process This?
The possibilities are endless with the Food Processor attachment.
You can effortlessly chop nuts, slice vegetables, grate cheese, puree soup, mix sauces, make dressings and dips, mix pastry crust, make salsa…
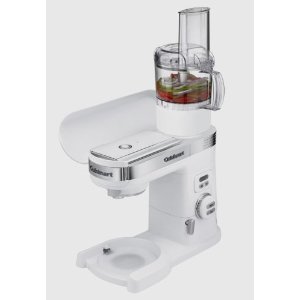
Set Up:
Open the top of the stand mixer. You’ll again be using the high speed power outlet (just like the blender). Mount and twist it on.
If you’re using the chopping blade, you’re ready to go.
If you want to use the slicing or shredding disc, first remove the chopping blade.
Then insert the stem and mount the slicing/shredding disc on top so the disc is close to the top of the bowl.
The disc is reversible–one side is for slicing, and the other is for shredding. Watch out, the Food Processor is really noisy.
Put the lid on, then the feed tube, and you’re ready to slice a cucumber or grate some cheese.
Here’s what’s included with the food processor:
- Clear Processor Bowl with 3 cup capacity
- Chopping Blade
- Reversible Slicing / Shredding Blade
- Both Blades are Stainless Steel
- Stem for mounting Reversible Disc
- Secure Lid
- Large Feed Tube for adding ingredients
- Measures 7 x 5 x 11 1/2
The “Juicy” Details
Who doesn’t like freshly squeezed juice?
With the Citrus Juicer attachment you can make fresh orange juice, squeeze lime juice for guacamole, or juice lemons to use in recipes such as a vinaigrette.
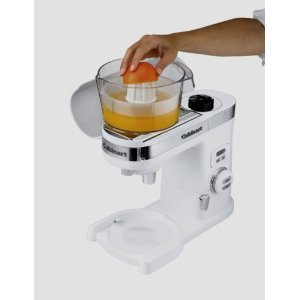
Set up:
The Citrus Juicer attaches to the mid-speed power outlet (the front outlet on the top of the mixer).
This one requires a little more set up.
First, use the back end of the reamer to remove the plug. Then, twist in the stem. Mount the citrus juicer on top, and put the reamer inside.
Juice!
Now you’re ready to juice! Turn on the machine and press a citrus fruit half to the reamer while the machine is running.
Remove:
To remove, twist the bowl until the stem is released.
Here are some key features of the Citrus Juicer:
- Universal Reamer extracts juice from any citrus fruit (lime up to a grapefruit in size)
- Strainer to separate pulp from juice
- 16 ounce capacity
- Recipe Book included
- Measures 7 1/2 x 6 1/2 x 6 inches
Get Into “the Grind”
You may be happy to learn that the Meat Grinder Attachment does more than grind hamburger.
The Mincer/Grinder can grind a variety of cheeses and vegetables so you can make everything from spreads and pates to hamburgers.
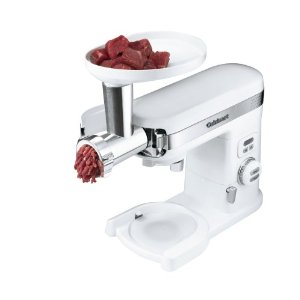
Set Up:
The Grinder attaches to the Slow-speed outlet on the front of the stand mixer.
Open the front cover, then pull the lever on the side while you twist and lock the Grinder into place.
Key Features
- 3 Grinding Plates for Fine, Medium, or Coarse Cuts
- 2 Sausage Nozzles
- Meat Grinder Wrench
- Made of Durable Metal
- Dishwasher Safe Parts
- Measures 10 1/2 x 6 1/2 x 8
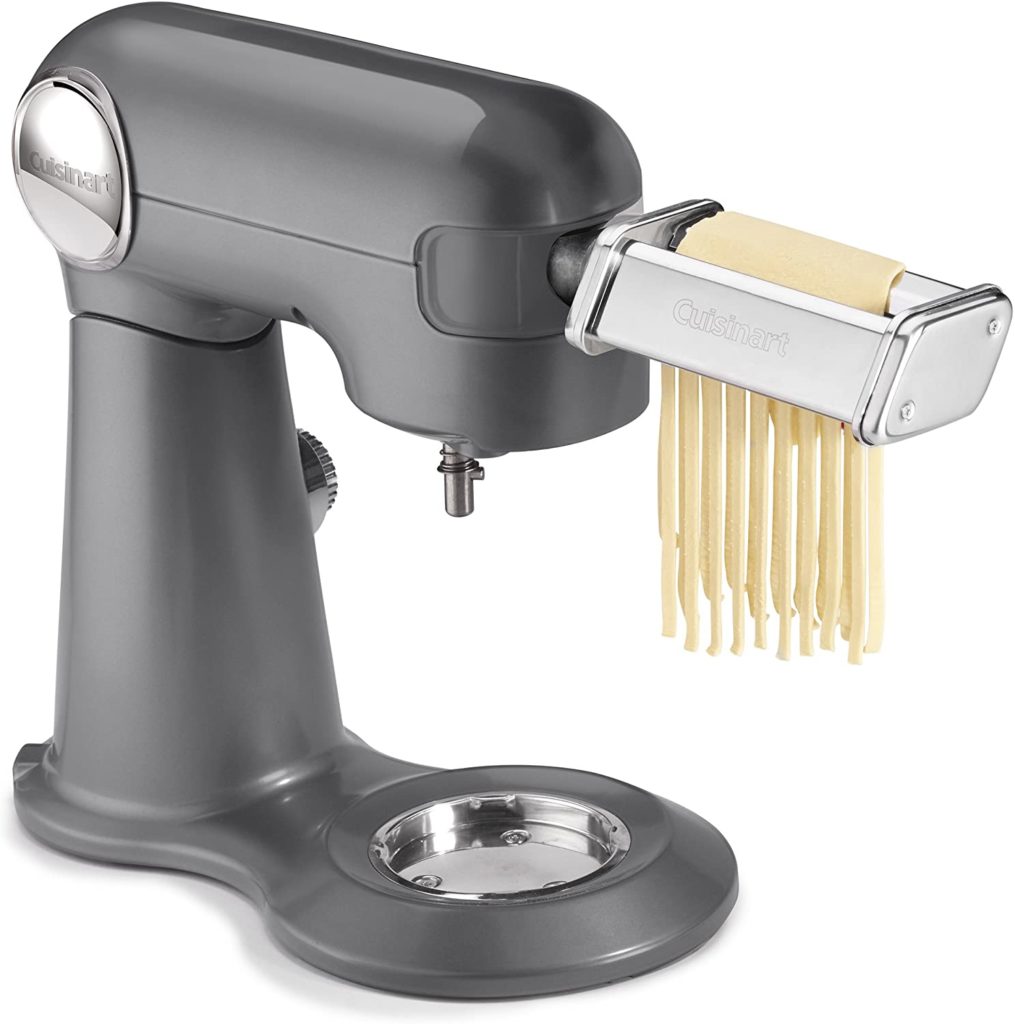
It’s Pasta Time!
The Pasta Maker attachment lets you make a variety of pastas–spaghetti, macaroni, large macaroni, rigatoni, fettuccine, and lasagna.

Set Up:
The Pasta Maker attaches to the Slow-speed outlet on the front of the stand mixer. Open the front cover, then pull the lever on the side while you twist and lock the Pasta Maker into place.
You can then drop dime-sized pieces of dough in the top, and pasta extrudes out the front!
Key Features
- 6 Pasta Plates
- Measuring Cup
- Cleaning Tool
- Wrench
- Dishwasher Safe Parts
- Measures 5 1/2 x 2 4/5 x 7 1/2
So there you have it, one kitchen appliance that can almost do it all. If it could make French fries and cook them for us, that’d be great 🙂
Hopefully that gives you an idea of the attachments available for the Cuisinart Mixer and how to use them.