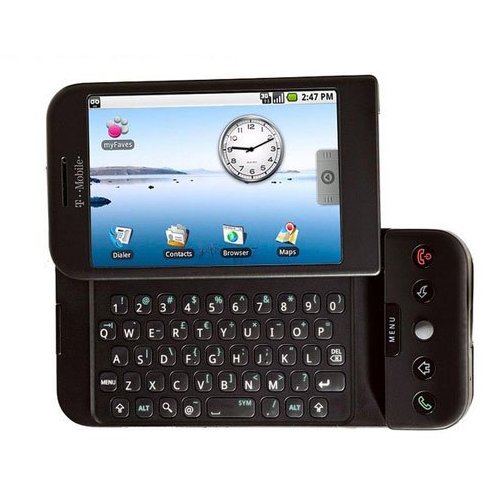
I put off getting a smart phone for as long as I could until the “real” phone came along with features I had been waiting for. A big fan of Google, I was excited to buy the G1 phone; however, the instructions that came with the phone had only a few steps to getting started, the rest was left to guess work and Internet searches.
Improving Battery Life:
Charging the G1 Battery – There’s lots of talk all over the Internet of how to improve the battery life of the G1 phone with little reference to the source. I’ll take as an authority, the guy at the T-mobile store who had the phone himself and said that when he started using his phone, he saw the battery life wasn’t good, he then let the battery run down to a couple percent and then charged it back up for 3-4 hours. He repeated this step for the next few charges and said his batter life was much, much better. I’ve done that now on my phone and have found the same.
GPS – GPS on the phone will drain the battery quickly, but as you can see, the GPS is only functioning when the GPS icon (looks like a little satellite) is in the top right of the status bar, so don’t be too concerned about that.
Wireless Internet – Most people agree that enabling the wireless uses up the battery more quickly. I’ve found that the Edge network (your data plan connection through T-mobile) isn’t the fastest thing out there, but it works just fine. Faster than dial-up.
Set Sync Times for Email – If you want to save more battery life, don’t have the phone sync every 5 minutes. You can turn off Auto-sync at Home > MENU > Settings > Data synchronization > Auto-sync. For what it’s worth, I leave mine on auto-sync. If you use the Email application (for other accounts than your Google Gmail Account for example), you can set the check rate by opening the Email Application (from your application lists) > MENU > Account Settings >Email check frequency. You can set for 5, 10, 15, 30, 60 minutes.
Adjust your screen brightness – From Home, press MENU > Settings > Sound & display > Brightness (you’ll need to scroll down to see it).
Fair Compare – Comparing battery life to your previous phone probably isn’t fair because you were used to your old phone, the features, etc., and it was probably pretty boring, now you have a new phone and want to play with the features all day long, of course the battery is going to run out more quickly. After you’re done using the phone every second of the day, you’ll see the batter lasts much longer.
Password Protection:
The guy at the T-mobile store had this on his phone, and I thought it was pretty neat. The password is a Connect-the-Dots type of password to open your phone (great for keeping kids or coworkers from playing with your phone and running the battery down).
From the Home Screen (you get here by pressing the button that has a house on it), press Menu > Settings > Security & location >Screen unlock pattern
Set your pattern here to enable a password. You can come back and disable/change the password if you want to turn the feature off.
You can still answer incoming calls without having to use the password which is nice.
Activating the G1 Phone:
“Can’t activate/connect” error – If you’re activating your phone for the first time and are enabling the data plan for the first time, the guy at the T-mobile store said it takes about 20 minutes for the data plan (which is needed for the phone to work) to activate. Mine took about 30 minutes before the phone would let me pass the activation screen with my Google account credentials.
Contacts – Importing and Using Contacts on G1
Auto Sync of Contacts – Contacts from your Google Account will be imported right to your phone’s listing of contacts and will continue to be updated as you sync your phone with your Google account. This feature is fantastic because you can easily add/delete contacts from Google and have the updates transferred to your phone. Old phones required that you sync to your computer or Outlook. What a mess!
Adding Pictures – Within you Gmail Account (use your computer and visit https://mail.google.com to get there), you can add pictures to your contact profiles. Upload them from your computer, or use a link from the web if you use Picasa Web Albums, you can view your albums and add pictures easily. You can also paste a URL address to a picture on another website. Click on the Contacts link on the left-hand side of your Gmail account. You’ll then be at the contacts page where you can add/change contact info.
Importing contacts from your SIM Card – For some reason, I don’t think this happened automatically on my phone. From the Home Screen, Click on the Contacts Application then Press MENU > Settings > SIM contacts importer to access the import feature.
You’ll probably have some duplicates as I did having some one’s phone number in my SIM card and email in my Google Contacts. Let you phone sync with Google, and then modify your new contacts as necessary in your Gmail account. Note, if you didn’t use a Gmail account prior to getting the Google Phone, the phone has you set one up when activated for the first time. You can export contacts from Outlook or other mail programs and import them into Gmail quite easily.
Contacts – Sending Text Messages, Editing, etc.
Sending Text Messages – When within your contacts program, press and hold on a contact’s name, you’ll then have the option to:
- View contact
- call Mobile
- Send SMS/MMS
- Add to favorites
- Edit contact
- Delete contact
Press the Back Arrow Button if you don’t want to use those actions at that time.
Sending Text Messages to Multiple People at the Same Time – This one took a little research, but it makes sense now. Click on the Messaging Application, Press New Message. In the To field, start typing the name of the first contact, and a list will appear of matching names. Press the contact you want to include, and start typing the name of the second person you want to add to the text message and so forth.
Android Marketplace – Getting New Applications for Android
Download Free Applications for your Android Phone – Just like the App Store by Apple, you can download free (and at some point paid-for) applications for your G1. One of the best is called ShopSavvy that helps you compare product prices just by scanning a bar code using the G1’s camera. It’s a great feature, you’re in the store, you see a product you like, flip it over and scan the UPC bar code, in seconds you can see if the product is cheaper somewhere else nearby (remember the G1 has GPS) or pricing on the Internet such as Amazon.com.
Access the Android Market by accessing your application list and pressing the icon entitled Market. You can then download and install. Install apps with a little bit of caution, research them a little bit so you don’t get an application that doesn’t work well or worse, causes problems for you phone.
The guy at the T-mobile store (don’t you love that title?) said that the applications are available for free right now, but sometime (perhaps mid to late 2009) the applications will require a fee just like many of the Apple “App Store” applications for the iPhone and iPod Touch.
The Status Bar – Best Tool Ever
Status Bar Features – Well, maybe not the “best tool ever,” but it does come in handy compared to my old phone. The bar is located at the very top of the screen. The status bar will let you know what services are running (GPS, Wifi, Edge, 3G, Bluetooth, etc.) in the right corner.
The left corner (also called the “Window Shade”) shows notifications that the phone has for you. For example, icons representing new Gmail, Email, Text Messages, voicemail, missed calls, and calendar events will appear. Simply touch and pull down the status bar to see notifications. You can dismiss notification, link directly to emails, call people back from missed calls; it’s great. Slide the notification bar back up from the bottom to get back to the screen you were viewing previously.
Keeping Up-to-Date
You might want to subscribe to the Android Community Feed at http://androidcommunity.com/feed/ to get the latest info on what’s happening and what’s coming up. Another good resource is the Google Android website at http://www.android.com
Fun Tips and Tricks – Hands On Video Demos of the G1 Android Phone from the Developers
Saving Stuff from the Internet – Save pictures and Mp3’s directly from the web to your android phone.
Using the Map Application to view Traffic Conditions
Using the Window Shade to see New emails, Text messages, calendar events
Customizing the Home Page and Searching for Applications
Keyboard shortcuts on the G1 Android – There are some pretty cool keyboard shortcuts that let you switch between applications on the G1.
Shortcuts you can use when currently viewing one application and you want to switch to another:
Switch to shortcuts (hold down the magnifying glass button (the search button) and then press the letter short cut at the same time:
Search + B = Browser
Search + C = Contacts
Search + E = Email
Search + G = Gmail
Search + I = Instant Message
Search + L = Calendar
Search + M = Maps
Search + P = Player (media player)
Search + S = Test Messaging
Search + Y = YouTube
G1 Accessories to get Started
Screen Protection – I recommend the
Invisibleshield T-mobile G1 screen protector by Invisible Sheild for the Google Screen. I’ve tried other screen protectors, and it works the best. I don’t think the whole phone needs the Invisible Shield on it, just the screen, but that’s a matter of preference.
Also came across this rubber case for under $2. Not bad.
Update 4/4/2009 – I can’t believe I forgot this! The below video got a lot of people excited about the G1 before it launched. I had forgotten about it, and just tested out the Street View on Google Maps. It’s awesome! Now if you’re looking at the location you’re already at, no big deal, but saw you’re going into town and want to know what side of the street something is on or to double check the accuracy of the map/destination location, use Google Street View on you G1.
— Update on the G1 —
The G1 has been a great phone for me. I wish the battery life were a little better, but it still gets the job done. It’s been fun to have the first Android phone, but I’ve started to get the itch for an upgrade.
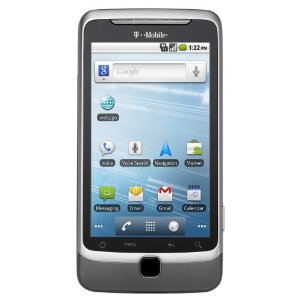
I’ve been waiting for the right upgrade to come along, and it finally has… the G2. How could I go with anything else but the follow-up to the famous G1? -Not to mention that I want a phone with a physical keyboard.
Everyone has different tastes when it comes to something so personal as picking a cellphone, but for me, the G2 is it.
You can read the reviews and see the specs for it below on Amazon:


